If you’ve ever been captivated by the allure of the Anarkali Lehenga, or you want to learn how to stitch Anarkali lehenga, you’re in for a treat.
Intricately designed, gracefully flowing, and utterly enchanting – the Anarkali Lehenga is a masterpiece of Indian fashion that has captured the hearts of women for generations.
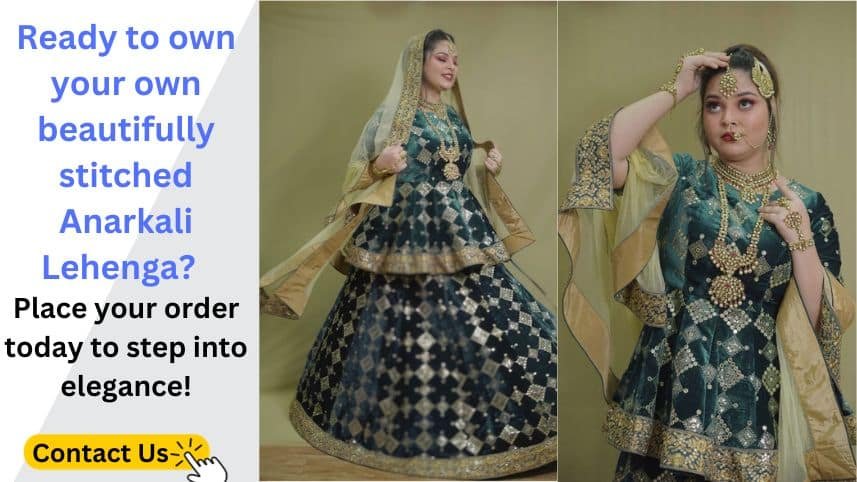
This timeless attire combines the elegance of the Anarkali suit with the grandeur of the Lehenga, resulting in a regal ensemble that’s perfect for special occasions.
In this step-by-step guide, we will unravel the secrets of creating your own Anarkali Lehenga. But first, let’s understand what an Anarkali Lehenga is and why you should consider stitching one for yourself.
Table of Contents
ToggleWhat is an Anarkali Lehenga?
The Anarkali Lehenga is a fusion of two iconic Indian outfits – the Anarkali suit and the Lehenga. It derives its name from Anarkali, a legendary dancer and courtesan of the Mughal Empire known for her mesmerizing beauty and grace. Just like its namesake, the Anarkali Lehenga exudes an aura of elegance and sophistication.
This ensemble typically consists of a fitted, long-sleeved bodice with a flared skirt, often adorned with intricate embroidery, sequins, and rich embellishments. The Anarkali Lehenga is celebrated for its timeless appeal and ability to make any woman feel like royalty.
Why Stitch Your Own Anarkali Lehenga?
While you can easily find Anarkali Lehengas in boutiques and online stores, there’s something truly magical about creating your own. Stitching your Anarkali Lehenga allows you to infuse your unique style and personality into every stitch. It’s an opportunity to choose the fabric, select the embroidery patterns, and ensure a perfect fit that accentuates your best features.
Stitching your Lehenga does not mean you sew it strictly by yourself, but you can get it stitched by any expert recommending your style and designs, choosing your favorite fabrics.
Furthermore, crafting your Anarkali Lehenga can be an immensely satisfying and fulfilling experience. It’s a journey that connects you with the rich traditions of Indian fashion and empowers you with the skills to create a masterpiece that reflects your individuality.
Importance of Mastering the Art of How to Stitch Anarkali Lehenga
Mastering the art of stitching an Anarkali Lehenga is not just about creating a beautiful garment but preserving a cultural legacy and contributing to the fashion world.
This skill transcends generations and can be passed down as a family tradition. Moreover, it empowers you to embrace and appreciate the artistry and craftsmanship of creating these exquisite ensembles.
As you embark on this creative journey, you’ll gain insights into the meticulous craftsmanship, the selection of fabrics, and the intricate embroidery techniques that make the Anarkali Lehenga a symbol of timeless beauty and grace.
So, whether you’re a budding fashion enthusiast or a seasoned seamstress, join us as we delve into the world of Anarkali Lehenga creation.
By the end of this guide, you’ll have a stunning outfit you can proudly call your own and a newfound appreciation for the artistry that makes the Anarkali Lehenga an enduring masterpiece.
Step 1: Getting Started

Gathering all the necessary materials and tools before you embark on your Anarkali Lehenga stitching journey is crucial. Here’s a list of what you’ll need:
- Fabric: Begin by selecting the fabric for your Anarkali Lehenga—lightweight and flowy fabrics like chiffon, georgette, silk, or crepe work best. The fabric choice will significantly influence your Lehenga’s overall look and comfort.
- Lining Fabric: You’ll need a lining fabric to provide structure and opacity to your Lehenga. Choose a lining fabric that complements your main fabric in color and weight.
- Matching Thread: Ensure you have a high-quality thread that matches the color of your fabric. This will help your stitches blend seamlessly.
- Needles and Pins: Invest in regular and ballpoint needles for your sewing machine and pins for securing fabric layers together.
- Measuring Tape: A good-quality measuring tape is essential for accurate body measurements.
- Scissors: Sharp scissors are a must for cutting fabric and thread neatly.
- Sewing Machine: If you have access to a sewing machine, it will significantly speed up the stitching process. However, you can also sew your Anarkali Lehenga by hand if you prefer.
- Embellishments: If you plan to add embellishments like sequins, beads, or embroidery, make sure you have these on hand.
Choosing the Right Fabric
Selecting the suitable fabric is the foundation of creating a stunning Anarkali Lehenga. Consider the following factors when choosing your fabric:
- Comfort: Since you’ll likely wear your Lehenga for extended periods, opt for a comfortable fabric against your skin. Lightweight and breathable fabrics are ideal.
- Body Type: Keep your body type in mind. Heavier fabrics may add volume, while lighter ones will drape gracefully. Choose accordingly to flatter your body shape.
- Season and Occasion: Consider the season and occasion you’re making the Lehenga. Silk or heavier fabrics work well for winter weddings, while lightweight options are perfect for summer festivities.
- Color and Design: Select a color that resonates with your style and the event’s theme. Bold colors and intricate prints can make a statement, while pastels offer a more subtle look.
Taking Accurate Measurements
Accurate measurements are the key to creating a perfectly fitted Anarkali Lehenga. Here’s how to take measurements:
- Bust: Measure around the fullest part of your bust, ensuring the tape is snug but not tight.
- Waist: Measure around your natural waistline, usually the narrowest part of your torso.
- Hips: Measure around the widest part of your hips, ensuring the tape is parallel to the ground.
- Length: Determine the desired size of your Lehenga, both from your waist to the desired hem and from the shoulder to the hem for the top.
- Shoulder: Measure from the tip of one shoulder to the tip of the other.
- Sleeve Length: If your Anarkali Lehenga will have sleeves, measure from your shoulder to your wrist.
By gathering the essential materials, choosing the suitable fabric, and taking precise measurements, you’re well on your way to mastering the art of stitching your own Anarkali Lehenga.
Step 2: Design Selection
When creating your own Anarkali lehenga, the journey begins with selecting the perfect design that reflects your style and personality.
Traditional vs. Contemporary Anarkali Lehenga Designs
Traditional Elegance: Traditional Anarkali lehengas exude timeless beauty deeply rooted in Indian culture and heritage. They feature intricate embroidery-rich fabrics like silk and brocade, often in vibrant, classic colors. Traditional designs are perfect for those who appreciate the charm of heritage and want to embrace the regal aura of bygone eras.
Contemporary Chic: Conversely, contemporary Anarkali lehengas offer a modern twist to this classic silhouette. They incorporate innovative cuts, unconventional color combinations, and experimental fabrics. Contemporary designs are ideal for fashion-forward individuals who want to make a statement and infuse their unique style into this traditional attire.
When choosing between traditional and contemporary Anarkali lehenga designs, consider your style, the occasion, and the level of comfort you desire. Traditional designs are a safe bet for timeless elegance, while contemporary designs allow you to express your individuality.
Customization Options
One of the most exciting aspects of designing your Anarkali lehenga is the freedom to customize every detail. Whether you choose a traditional or contemporary design as your base, here are some customization options to consider:
- Color Palette: Experiment with colors that resonate with your personality. Traditional designs often favor reds, pinks, and gold, while contemporary designs open up possibilities with pastels, jewel tones, and even monochromatic schemes.
- Embroidery and Embellishments: Add your personal touch by selecting the type and density of embroidery. Traditional designs typically feature heavy zari work and intricate patterns, whereas contemporary designs may embrace minimalistic or abstract embellishments.
- Silhouette: Tailor the silhouette to flatter your body shape and comfort preferences. Whether you prefer a flared Anarkali skirt or a sleeker A-line cut, the choice is yours.
- Neckline and Sleeves: Experiment with neckline designs, sleeve lengths, and styles. From boat necks to off-shoulder sleeves, customization options abound to make your Anarkali lehenga uniquely yours.
- Dupatta: Consider how you want to drape the dupatta or whether you want to forgo it altogether for a more modern look.
Sketching Your Design
Before you embark on the stitching journey, sketching your envisioned design is essential. Sketching helps you visualize your Anarkali lehenga, plan the embroidery layout, and make informed decisions on customization.
- Gather Inspiration: Gather inspiration from fashion magazines, Pinterest, or even traditional art and culture. This will help you develop a clear vision for your design.
- Sketch the Outline: Using a sketchbook or design software, sketch the basic outline of your Anarkali lehenga. Pay attention to the neckline, sleeves, skirt shape, and overall silhouette.
- Detail the Embroidery: Add details of the embroidery, motifs, and embellishments you want to incorporate. Consider the placement and density of the embroidery to achieve the desired look.
- Color Palette: Use colored pencils or digital tools to experiment with different color combinations until you find the one that resonates with your vision.
By sketching your design, you’ll have a blueprint to guide you through the stitching process, ensuring that your Anarkali lehenga turns out just as you imagined.
Step 3: Pattern Making
When creating your own Anarkali lehenga, understanding the art of pattern-making is an essential skill that will empower you to craft a masterpiece.
Understanding the Basic Patterns
Before diving into the creative process, it’s essential to familiarize yourself with the fundamental patterns that lay the foundation for your Anarkali lehenga. These patterns serve as the blueprint for your masterpiece. Here are some key elements to grasp:
- Flare:The Anarkali lehenga is known for its graceful flare, which gives it its iconic silhouette. Understanding how to calculate and create the desired amount of flare is the first step to mastering the art.
- Bodice:The bodice or choli of the Anarkali lehenga varies in design, from traditional to contemporary styles. Learning how to tailor the bodice to your preferences is crucial for a personalized touch.
- Length:Anarkali lehengas come in various lengths, from floor-sweeping to ankle-length. Knowing how to measure and determine the perfect length for your ensemble is essential.
- Neckline and Sleeve:The neckline and sleeve styles can make or break the overall look of your Anarkali lehenga. Familiarize yourself with different neckline and sleeve options to make your creation unique.
Drafting the Anarkali Pattern
Once you’ve grasped the basics, it’s time to put your creative ideas onto paper. Drafting the Anarkali pattern is where your vision takes shape. Here’s what this step entails:
- Measurements:Accurate measurements are the cornerstone of a well-fitting Anarkali lehenga. Learn to take precise measurements of your waist, hips, chest, and length to create a pattern that fits like a dream.
- Pattern Creation:Using your measurements and design preferences, draft the pattern on paper or a pattern-making software. Pay attention to the flare, bodice, neckline, and sleeve details to bring your vision to life.
- Mock-Up:Before cutting into your precious fabric, consider creating a mock-up or toile of your pattern using inexpensive fabric. This allows you to make necessary adjustments and perfect the fit and design.
Cutting the Fabric
With your pattern ready and refined, it’s time to bring your Anarkali lehenga to life by cutting the chosen fabric. Here’s how to approach this step:
- Fabric Selection:Choose the fabric that best suits your vision, considering factors like drape, texture, and color. Traditional choices include silk, georgette, or chiffon, but endless possibilities exist.
- Pinning and Cutting:Transfer your pattern onto the selected fabric and carefully cut along the lines. Take your time and use sharp fabric scissors for clean and precise cuts.
- Seams and Finishing:Pay attention to the seams, ensuring they are neat and secure. Consider using techniques like overlocking or zigzag stitching to prevent fraying.
Step 4: Stitching Techniques
Hand Stitching vs. Machine Stitching
Before you thread your needle or power up your sewing machine, you must decide on your stitching method. Each approach has its unique advantages and considerations.
Hand Stitching:
- Craftsmanship that Takes Time: Hand stitching offers the advantage of meticulous attention to detail, making it ideal for working with delicate fabrics and intricate embroidery.
- Artisanal Appeal: The imperfections inherent in hand stitching can add an authentic, artisanal touch to your Anarkali lehenga, making it unique.
- Precision and Control: Hand stitching provides complete control over the pace and tension of each stitch, ensuring accuracy in every aspect of your work.
Machine Stitching:
- Speed and Efficiency: Machine stitching is faster and more efficient, making it a suitable choice for those with limited time or those working with sturdier fabrics.
- Consistency: Machines can create uniform stitches, ensuring a polished and professional appearance throughout your garment.
- Durability: Machine stitching tends to be more robust and resilient, especially for garments that endure frequent use.
Ultimately, your choice between hand and machine stitching will depend on your skill level, available time, and the specific outcome you envision for your Anarkali lehenga.
Sewing Seam Types
Seamwork is pivotal in constructing an Anarkali lehenga, influencing its fit, comfort, and overall aesthetics. Common seam types employed in Anarkali lehenga construction include:
- Straight Seam: A fundamental seam used for joining two fabric edges, commonly employed in connecting panels for the lehenga skirt and bodice.
- French Seam: Ideal for lightweight and delicate fabrics, the French seam encases raw edges, resulting in a neat finish on the garment’s interior.
- Princess Seam: These curved seams run vertically from the armhole to the hem, creating a flattering fit by accentuating the body’s natural curves.
- Zigzag Seam: To prevent fabric fraying, zigzag seams often finish raw edges on the garment’s interior.
The appropriate seam type is crucial for achieving structural integrity and a refined appearance.
Embellishments
Anarkali lehengas are renowned for their opulent embellishments, which infuse grandeur and sophistication into the garment. Some popular embellishment techniques include:
- Zardozi Embroidery: An ancient Indian embroidery technique that utilizes metallic threads, sequins, and beads to create intricate and regal designs.
- Mirror Work: Mirrors of various shapes and sizes are intricately embroidered onto the fabric, reflecting light and creating a captivating effect.
- Kundan Work: Semi-precious stones are meticulously set into the fabric, forming stunning patterns and designs.
- Thread Embroidery: Intricate threadwork is employed to craft beautiful motifs and patterns, adding depth and texture to the Lehenga.
Decorative Stitching
Elevate the allure of your Anarkali lehenga with decorative stitching techniques, such as:
- Brocade Stitch: This raised, textured stitch lends a luxurious look to the fabric.
- Appliqué: Layering fabric pieces to create intricate designs and textures on the Lehenga.
- Scalloped Edge Stitch: A decorative edging technique that adds elegance to hems and borders.
Step 5: Assembling the Anarkali Lehenga
Now that you’ve meticulously prepared your fabric measured and cut it, and constructed the inner lining, it’s time to bring your Anarkali Lehenga to life.
In this step, we’ll guide you through attaching panels and layers, adding the characteristic flare, and creating the stunning bodice that defines this elegant attire.
Attaching Panels and Layers
- Lay Out the Panels:Lay your cut fabric panels on a clean, flat surface. Ensure they are arranged correctly, and double-check that the fabric’s right sides face each other if you use a layered approach.
- Pin and Stitch:Start from the bottom panel and work your way up. Pin the panels together along the edges where they will be attached. Use a matching thread color and a straight stitch on your sewing machine to join them. Leave space for the waistband or belt to cinch the Lehenga at the waist.
- Finish the Edges:Once the panels are attached, finish the seam allowances using a serger or a zigzag stitch. This will prevent fraying and give your Lehenga a professional look.
Adding the Flare
- Cutting the Flare: You’ll need to cut a circular piece of fabric to create the signature Anarkali flare. The size of the circle will determine the extent of the flare. The larger the circle, the more dramatic the flare. You can use a compass or a string tied to a pivot point to create a perfect circle.
- Attach the Flare: Pin the circular piece of fabric to the waistline of your Anarkali lehenga. Ensure it is evenly distributed and the circle’s center aligns with the center of your waist. Stitch it in place, leaving an opening for your chosen zipper or fastening method.
Creating the Bodice
- Bodice Pattern: Use your chosen bodice pattern to cut out the front and back pieces. The bodice pattern should match your measurements and design preferences, whether sleeveless, short-sleeved, or long-sleeved.
- Stitch the Bodice: Stitch the front and back bodice pieces together at the shoulders. If your design includes sleeves, attach them at this stage as well.
- Fitting: Try on the bodice to ensure it fits perfectly. Make any necessary adjustments, and then sew the side seams.
- Neckline and Finishing: Finish the neckline and armholes with bias binding or facing, as per your chosen design. You can also embellish the bodice with embroidery, sequins, or other decorative elements for a personalized touch.
By completing this step, you’ve transformed your fabric into a beautifully assembled Anarkali lehenga with attached panels and layers, a graceful flare, and an elegant bodice.
Your Anarkali lehenga is now taking shape, and it’s starting to resemble the iconic traditional attire perfect for special occasions and celebrations.
Step 6: Fitting and Adjustments
Once you’ve painstakingly crafted the bodice and added the exquisite flare to your Anarkali Lehenga, it’s time to focus on achieving the perfect fit. Ensuring that your Lehenga feels comfortable and allows easy mobility is crucial for looking and feeling your best on any occasion.
Here’s how to do it:
Trying on the Lehenga
Step into your Anarkali lehenga before making any adjustments, and fasten it securely. Take a moment to stand in front of a mirror and evaluate how the lehenga drapes on your body. Pay attention to the following aspects:
- Waistline: Check if the waistline sits comfortably and securely on your natural waist. It should neither feel too tight nor too loose.
- Bust: Ensure that the bodice fits snugly around your bust without any gaping or excessive pressure. It should offer proper support.
Length: Evaluate the length of the Lehenga. It should gracefully skim the floor, allowing you to walk comfortably without tripping.
Making Necessary Alterations
If you notice any issues during your trial, it’s time to make the necessary alterations. Here’s what you can do:
- Adjusting the Waist: If the waist feels too tight, let it out slightly by unpicking the waistband and adding extra fabric or loosening the drawstrings if your Lehenga has them. Conversely, if it’s too loose, take it in by sewing a narrower seam.
- Reshaping the Bodice: If there are fit issues, like gaping or discomfort, adjust the darts, seams, or princess lines to ensure a snug but comfortable fit.
- Hemming: If the length is too long, hem the Lehenga to your desired length. Ensure that it doesn’t touch the floor to prevent tripping, especially if you plan to wear heels.
Ensuring Comfort and Mobility
Remember that comfort and mobility are vital while making these alterations. Ensure you can comfortably sit, stand, and move your arms without restrictions.
Test your range of motion by walking around and performing some basic dance steps, as you might need to do during events. The goal is to feel at ease and elegant in your Anarkali lehenga.
Once you’ve successfully adjusted the Lehenga to fit your body like a dream and provide excellent mobility, you’re one step closer to mastering the art of stitching an Anarkali lehenga.
Step 7: Adding Dupatta
The Anarkali Lehenga ensemble is complete with the graceful addition of a dupatta. This versatile piece adds elegance to your attire and allows you to experiment with different draping styles, embellishments, and attachment methods.
In this step, we will explore how to take your Anarkali Lehenga to the next level by mastering the art of the dupatta.
Styles of Dupatta Draping
The draping style is the first thing to consider when adding a dupatta to your Anarkali Lehenga. The way you drape your dupatta can completely transform your look. Here are a few popular types to consider:
- Classic Over-the-Shoulder:This is the most common and timeless way to drape a dupatta. Let it flow gracefully over one shoulder, either pinned or left loose. It’s a simple yet elegant choice for any occasion.
- Front Diagonal Drape:For a modern and chic look, drape the dupatta diagonally across your front, securing it at the opposite hip. This style adds a contemporary twist to your traditional outfit.
- Veil-Style Dupatta:Consider draping the dupatta over your head like a veil for a regal and royal appearance. This style is often chosen for weddings and special occasions, giving you a majestic aura.
- Cape-Style Dupatta:For a trendy and unique touch, wear the dupatta as a cape by draping it over your shoulders and securing it in front. This style adds drama and flair to your Anarkali Lehenga.
Embellishing the Dupatta
To make your Anarkali Lehenga stand out, embellishing the dupatta is essential. You can choose from a plethora of options to adorn your dupatta:
- Embroidery:Consider adding intricate embroidery to the edges or throughout the dupatta. This can include zari work, sequins, or threadwork that complements your Lehenga’s design.
- Mirror Work:Traditional mirror work or ‘gota patti’ can add a dazzling touch to your dupatta, creating a mesmerizing play of light as you move.
- Tassels and Latkans:Attach decorative tassels or latkans to the corners of your dupatta for a playful and eye-catching effect.
- Prints and Patterns:Opt for unique prints or patterns that match the color scheme and design of your Lehenga. This can create a harmonious and well-coordinated look.
Attaching the Dupatta to Lehenga
How you attach the dupatta to your Anarkali Lehenga is crucial for both comfort and aesthetics. Some standard methods include:
- Pinning:Use discreet safety pins to secure the dupatta at your shoulder or waist. Ensure it drapes elegantly without any awkward bunching or tugging.
- Dupatta Clips:Invest in decorative dupatta clips or brooches to fasten the dupatta in place. This not only keeps it secure but also adds a touch of sophistication.
- Stitching:For a seamless and tailored look, you can have the dupatta stitched directly to your blouse or Lehenga. This method ensures that the dupatta stays in place throughout the event.
With these options for draping styles, embellishments, and attachment methods, you can customize your Anarkali Lehenga’s dupatta to match your style and the occasion you’re dressing for.
Mastering the art of the dupatta will elevate your entire ensemble, making you the center of attention at any event. So, experiment to find the perfect dupatta style that complements your Anarkali Lehenga and showcases your unique flair.
Step 8: Finishing Touches
The final step in creating your stunning Anarkali Lehenga involves giving it the flawless finishing touches that will make it truly exceptional. This phase encompasses hemming and edging, adding zippers or hooks, conducting quality assurance checks, and performing final inspections.
Hemming and Edging
Begin by carefully hemming the edges of the Anarkali Lehenga. A neat and even hem not only adds durability but also enhances the overall aesthetics of your creation.
Depending on your design and fabric choice, you can opt for a traditional fold-and-stitch hem or explore more decorative edging techniques like lace, sequins, or beadwork. Ensure that the length is consistent and any excess fabric is trimmed neatly.
Adding Zippers or Hooks
To ensure that your Anarkali Lehenga fits perfectly and is easy to wear, it’s crucial to add the appropriate fasteners. Zippers and hooks are the most common choices.
If you’re going for a seamless look, concealed zippers work well, while hooks can add a touch of tradition. Carefully attach these fasteners to the garment, ensuring they are securely in place and function smoothly.
Quality Assurance
Before proceeding further, take a moment to conduct a thorough quality assurance check. This step is vital to ensure that your Anarkali Lehenga is free from defects and meets your high standards.
Pay attention to the stitching quality, the alignment of seams and embellishments, and the overall symmetry. Verify that the measurements are accurate and have no loose threads or uneven edges.
Final Checks
With your Anarkali Lehenga nearly complete, perform a final set of checks. Try it on to ensure it fits comfortably and drapes elegantly. Walk around in it to assess its movement and flow.
Examine it in different lighting conditions to ensure the colors and embellishments sparkle as desired. Lastly, have a trusted friend or family member provide feedback and make necessary adjustments based on their observations.
Step 9: Styling and Accessorizing
Once you’ve meticulously stitched your Anarkali Lehenga and it fits like a dream, it’s time to add the perfect styling and accessorizing to take your fashion game up. Styling and accessorizing your Anarkali Lehenga is where you master the art of looking effortlessly elegant.
Here’s how to do it step by step:
Choosing Jewelry and Footwear
- Elegant Earrings: Start with a statement piece of jewelry – a pair of exquisite earrings. Depending on the color and embellishments of your Anarkali Lehenga, opt for contrasting or complementary earrings. Jhumkas, chandbalis, or delicate studs can all work wonders to frame your face.
- Statement Necklace or Choker: Consider adding a striking necklace or choker if your outfit’s neckline allows it. A Kundan or Polki necklace can add a regal touch, while a simple pearl choker can exude timeless charm.
- Bangles or Bracelets: For your wrists, choose bangles or bracelets that align with the overall theme of your Anarkali Lehenga. Stacking metallic bangles, glass bangles, or even a single statement kada can elevate your look.
- Ankle-Strap Heels or Juttis: Moving on to footwear, pick a pair of shoes that are not only comfortable but also complement your Anarkali Lehenga. Ankle-strap heels add a touch of sophistication, while traditional embroidered juttis bring cultural authenticity to your outfit.
Hair and Makeup Tips
Hair:
- Elegant Updo:Opt for an elegant updo like a bun or a braided hairstyle to keep the focus on your attire and accessories. These hairstyles also prevent your hair from overshadowing your Anarkali Lehenga.
- Accessories in Your Hair:To take your hair game to the next level, consider adding hairpins, decorative hair combs, or fresh flowers that match the colors of your Lehenga.
Makeup:
- Dewy Base:Achieve a flawless, dewy complexion as your canvas. Use a high-quality foundation and concealer to even out your skin tone.
- Bold Eyes or Lips:Decide whether you want fierce, smoky eyes or a statement lip color. Avoid overwhelming both features with heavy makeup. Balance is key.
- Bindi:Remember to adorn your forehead with a bindi that complements your Anarkali Lehenga. It’s a subtle yet essential touch to complete your look.
Step 10: Final Look Check
- Full-Length Mirror Inspection: Before stepping out, take a moment to stand in front of a full-length mirror. Check every detail of your ensemble – from the fall of your Lehenga to the placement of your accessories.
- Confidence is Key: Remember, the most crucial accessory is your confidence. Walk with poise and grace, and let your Anarkali Lehenga radiate the beauty of tradition and fashion combined.
You’ll ensure that your Anarkali Lehenga look is spectacular by carefully selecting the proper jewelry footwear and perfecting your hair and makeup.
Step 11: Maintenance and Care
Congratulations on successfully stitching your Anarkali Lehenga! Now, let’s delve into the essential steps to keep it looking pristine for years to come. Proper maintenance and care are vital to preserving the beauty and allure of your exquisite creation.
Cleaning Your Anarkali Lehenga
Cleaning your Anarkali Lehenga should be done with utmost care to avoid damaging the delicate fabrics and intricate embellishments. Here’s how to do it right:
- Dry Cleaning: Always opt for professional dry cleaning services for your Anarkali Lehenga. Dry cleaning ensures that the colors stay vibrant and the fabric remains intact.
- Spot Cleaning: In case of minor stains or spills, use a clean, dry cloth to blot the area gently. Never rub the stain, as it may worsen the damage. Consult a professional cleaner for stubborn stains.
- Air Out: After wearing your Lehenga, hang it in a well-ventilated area to dissipate any perspiration or odors. Avoid direct sunlight, as it can fade the colors over time.
Proper Storage
Storing your Anarkali Lehenga correctly is crucial to prevent wrinkles, snags, and other damage. Follow these storage tips:
- Use a Garment Bag: Use a breathable garment bag to protect your Lehenga from dust and pests. Make sure the bag is made of natural fibers like cotton.
- Padding: Place tissue paper or muslin cloth between the folds of your Lehenga to prevent the embroidery from scratching or catching on itself.
- Avoid Hanging: While it’s okay to hang your Lehenga for short periods, it’s best to store it folded to avoid stretching the fabric over time.
Repairs
Even with the utmost care, accidents can happen, and wear and tear are inevitable. Be prepared to address repairs promptly:
- Loose Embellishments: If you notice any loose beads, sequins, or embroidery, secure them immediately to prevent further damage. You can use clear fabric glue for minor repairs.
- Consult a Professional: For more extensive damage, consult a professional tailor or an embroiderer experienced in working with intricate Lehengas.
Preservation
Preserve the beauty and value of your Anarkali Lehenga by taking these additional precautions:
- Avoid Perfume and Makeup: Apply perfume and makeup before putting on your Lehenga to prevent stains and odors.
- Rotate Wear: If you have multiple Lehengas, rotate their usage to reduce wear on any one piece.
Following these maintenance and care guidelines ensures that your Anarkali Lehenga remains a cherished wardrobe treasure, ready to dazzle on any special occasion. With the proper care, your exquisite creation will continue to radiate timeless elegance and grace.

Conclusion
In conclusion, this step-by-step guide has delved deep into the art of stitching an Anarkali Lehenga, emphasizing mastering this craft. I’ve not only provided you with a comprehensive roadmap to create your own Anarkali Lehenga but also encouraged you to embark on this creative journey.
The joy of crafting your own Anarkali Lehenga is unparalleled, as it reflects your unique style and personality. So, don’t hesitate – pick up your needle and thread and start stitching your dream Anarkali Lehenga today.
With patience and practice, you’ll soon find yourself mastering this exquisite art form, creating stunning garments that genuinely reflect your individuality and creativity. Happy stitching!
Please share this post with others as much as you can and drop your comments below regarding this post.
Thank you.